Social media is a major channel in inbound marketing these days and we have to post content regularly, so that we stay relevant to our leads and they eventually convert.
At the same time many of our followers experience information overload in this digital age and visual content marketing plays an important role in catching user's attention and stop-scrolling.
DynaPictures helps you to automate your design production so that you can post more, spend less time and get more engagement on social media .
Your automation journey starts with just a few simple steps:
- You create an image template first.
- And then use either website, No-Code tools or API to produce designs automatically.
You can start by using a ready-made template from a library, for example the one below. Note the layer names on the left, as we will be replacing their contents when producing new image variations:

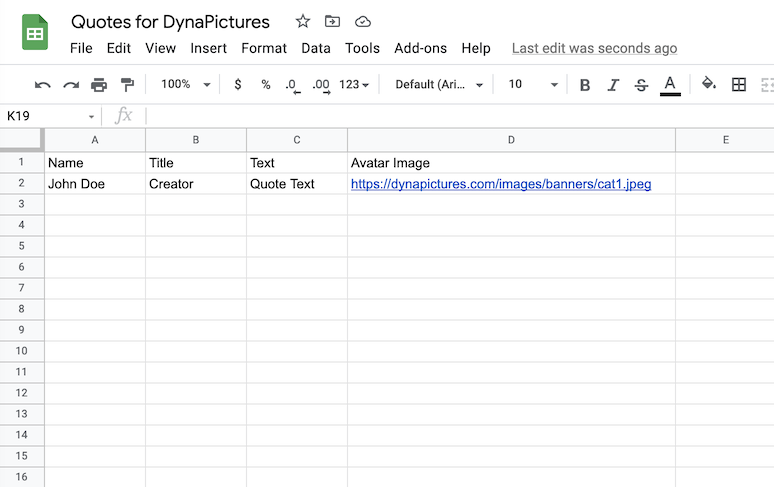
Then you need to prepare the input data to feed into DynaPictures and produce custom designs. Let's create a spreadsheet with test data. Each column corresponds to the layer that we want to customize.
Finally, depending on your background and skill set, there are many ways to automate your design production:
Let's look at each method in detail so that you can choose a one that works best for you.
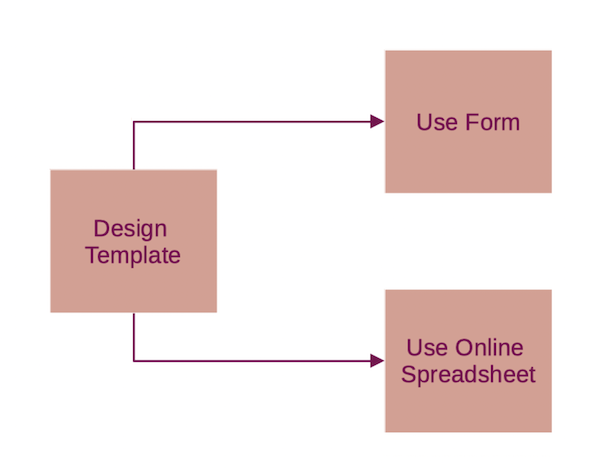
1. Using DynaPictures Website Only
This is the simplest way to start with DynaPictures quckly. You design an image template first, and then either use forms or online spreadsheets to generate image variations.
1.1 Forms
With forms you can generate image variations sequentially one by one. The automation level is quite low in this case, as you may want to generate many images in bulk, but sometimes it's anyway much better and faster than copy-pasting and editing text in graphics editor directly. Another advantage of forms is that you can share the form link with others and delegate image generation. Here is a step-by-step detailed tutorial on how you can use forms to autogenerate banners for social media.
1.2 Online Spreadsheet
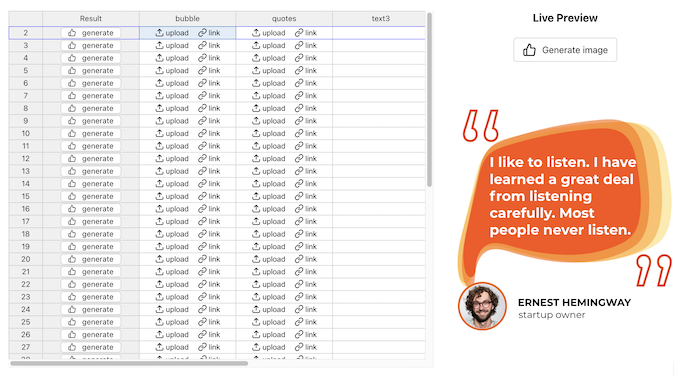
Online Spreadsheet offers a better level of automation, as you can focus on content production first - enter all texts into the columns for each individual layer, preview the results and only then generate tens or hundreds of images at once.
Here is a detailed guide on how you can use online spreadsheet for design automation.
2. Using No-Code Tools
No-Code tools offer a great way to connect DynaPictures with the other tools you already use and seemlessly integrate it into your daily workflows. You can also build your creative workflows and combine the tools in a way that helps you to stand out from your compeition.
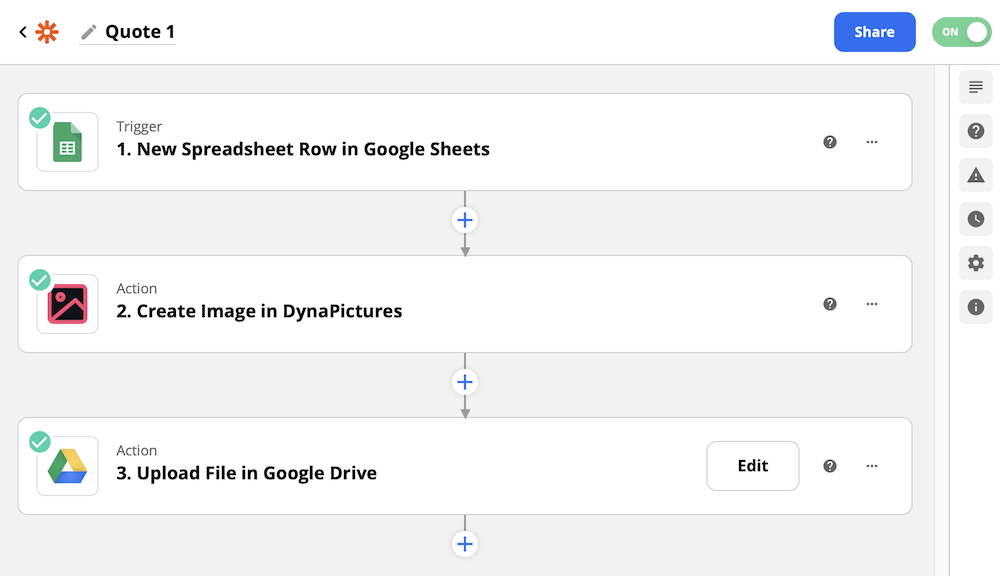
Here is a common example of the automation workflow to generate banners for social media: when new rows with texts and images for the banners are added to the spreadsheet, take these rows and generate new banners using DynaPictures, and once new banners are generated, save them into a specific folder on Google Drive.
Here is detailed step-by-step tutorial on how to create this workflow using Zapier.
There are many other ways to seemlessly integrate DynaPictures, for more automation examples have a look at our No-Code and automation use-cases.
DynaPictures is supported by all major No-Code plattforms in case you already use one of them:
- DynaPictures on Pabbly Connect
- DynaPictures on Integromat is planned
3. Using API
DynaPictures provides the REST API for design automation tasks. You can generate an image variation, browser templates as well as subscribe to recieve a webhook notification when new image is generated.
Have a look at this step-by-step tutorial on how to generate banners using REST API.
Fore more details, see REST API Reference.